-
Notifications
You must be signed in to change notification settings - Fork 20
JPL Comfort Respirator
![]() Download STL files
Download STL files

Singleport on (left), Multiport on (right).
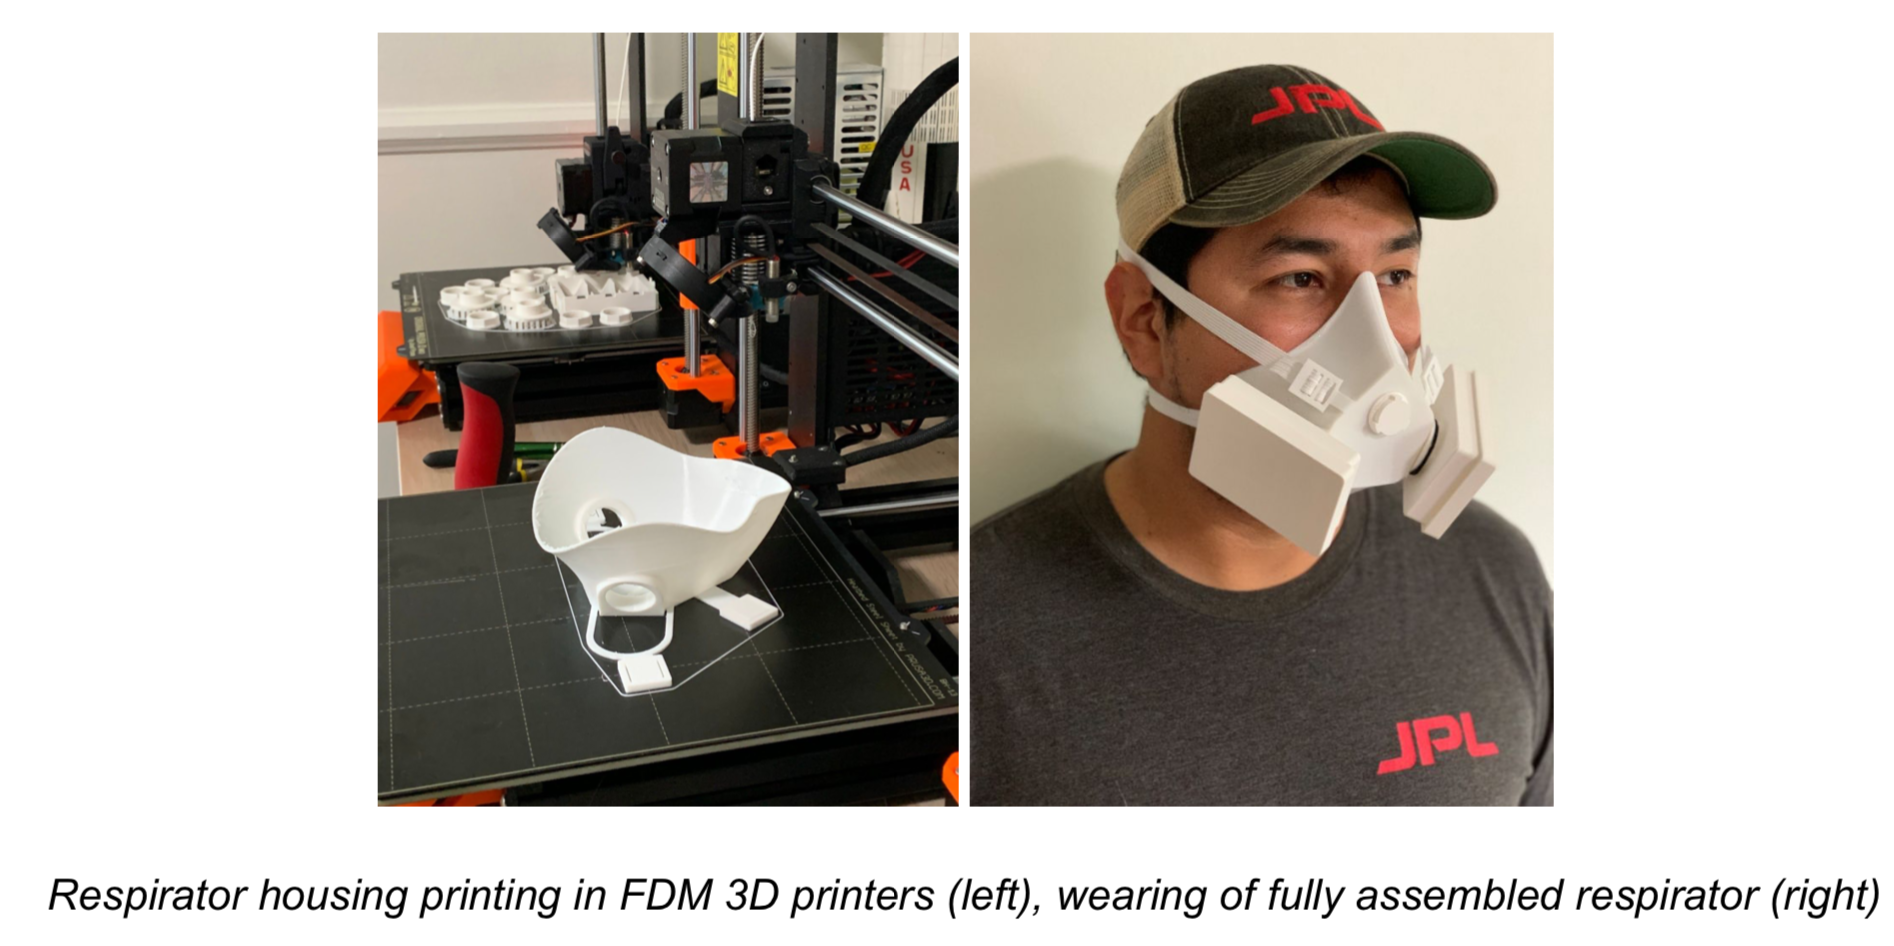
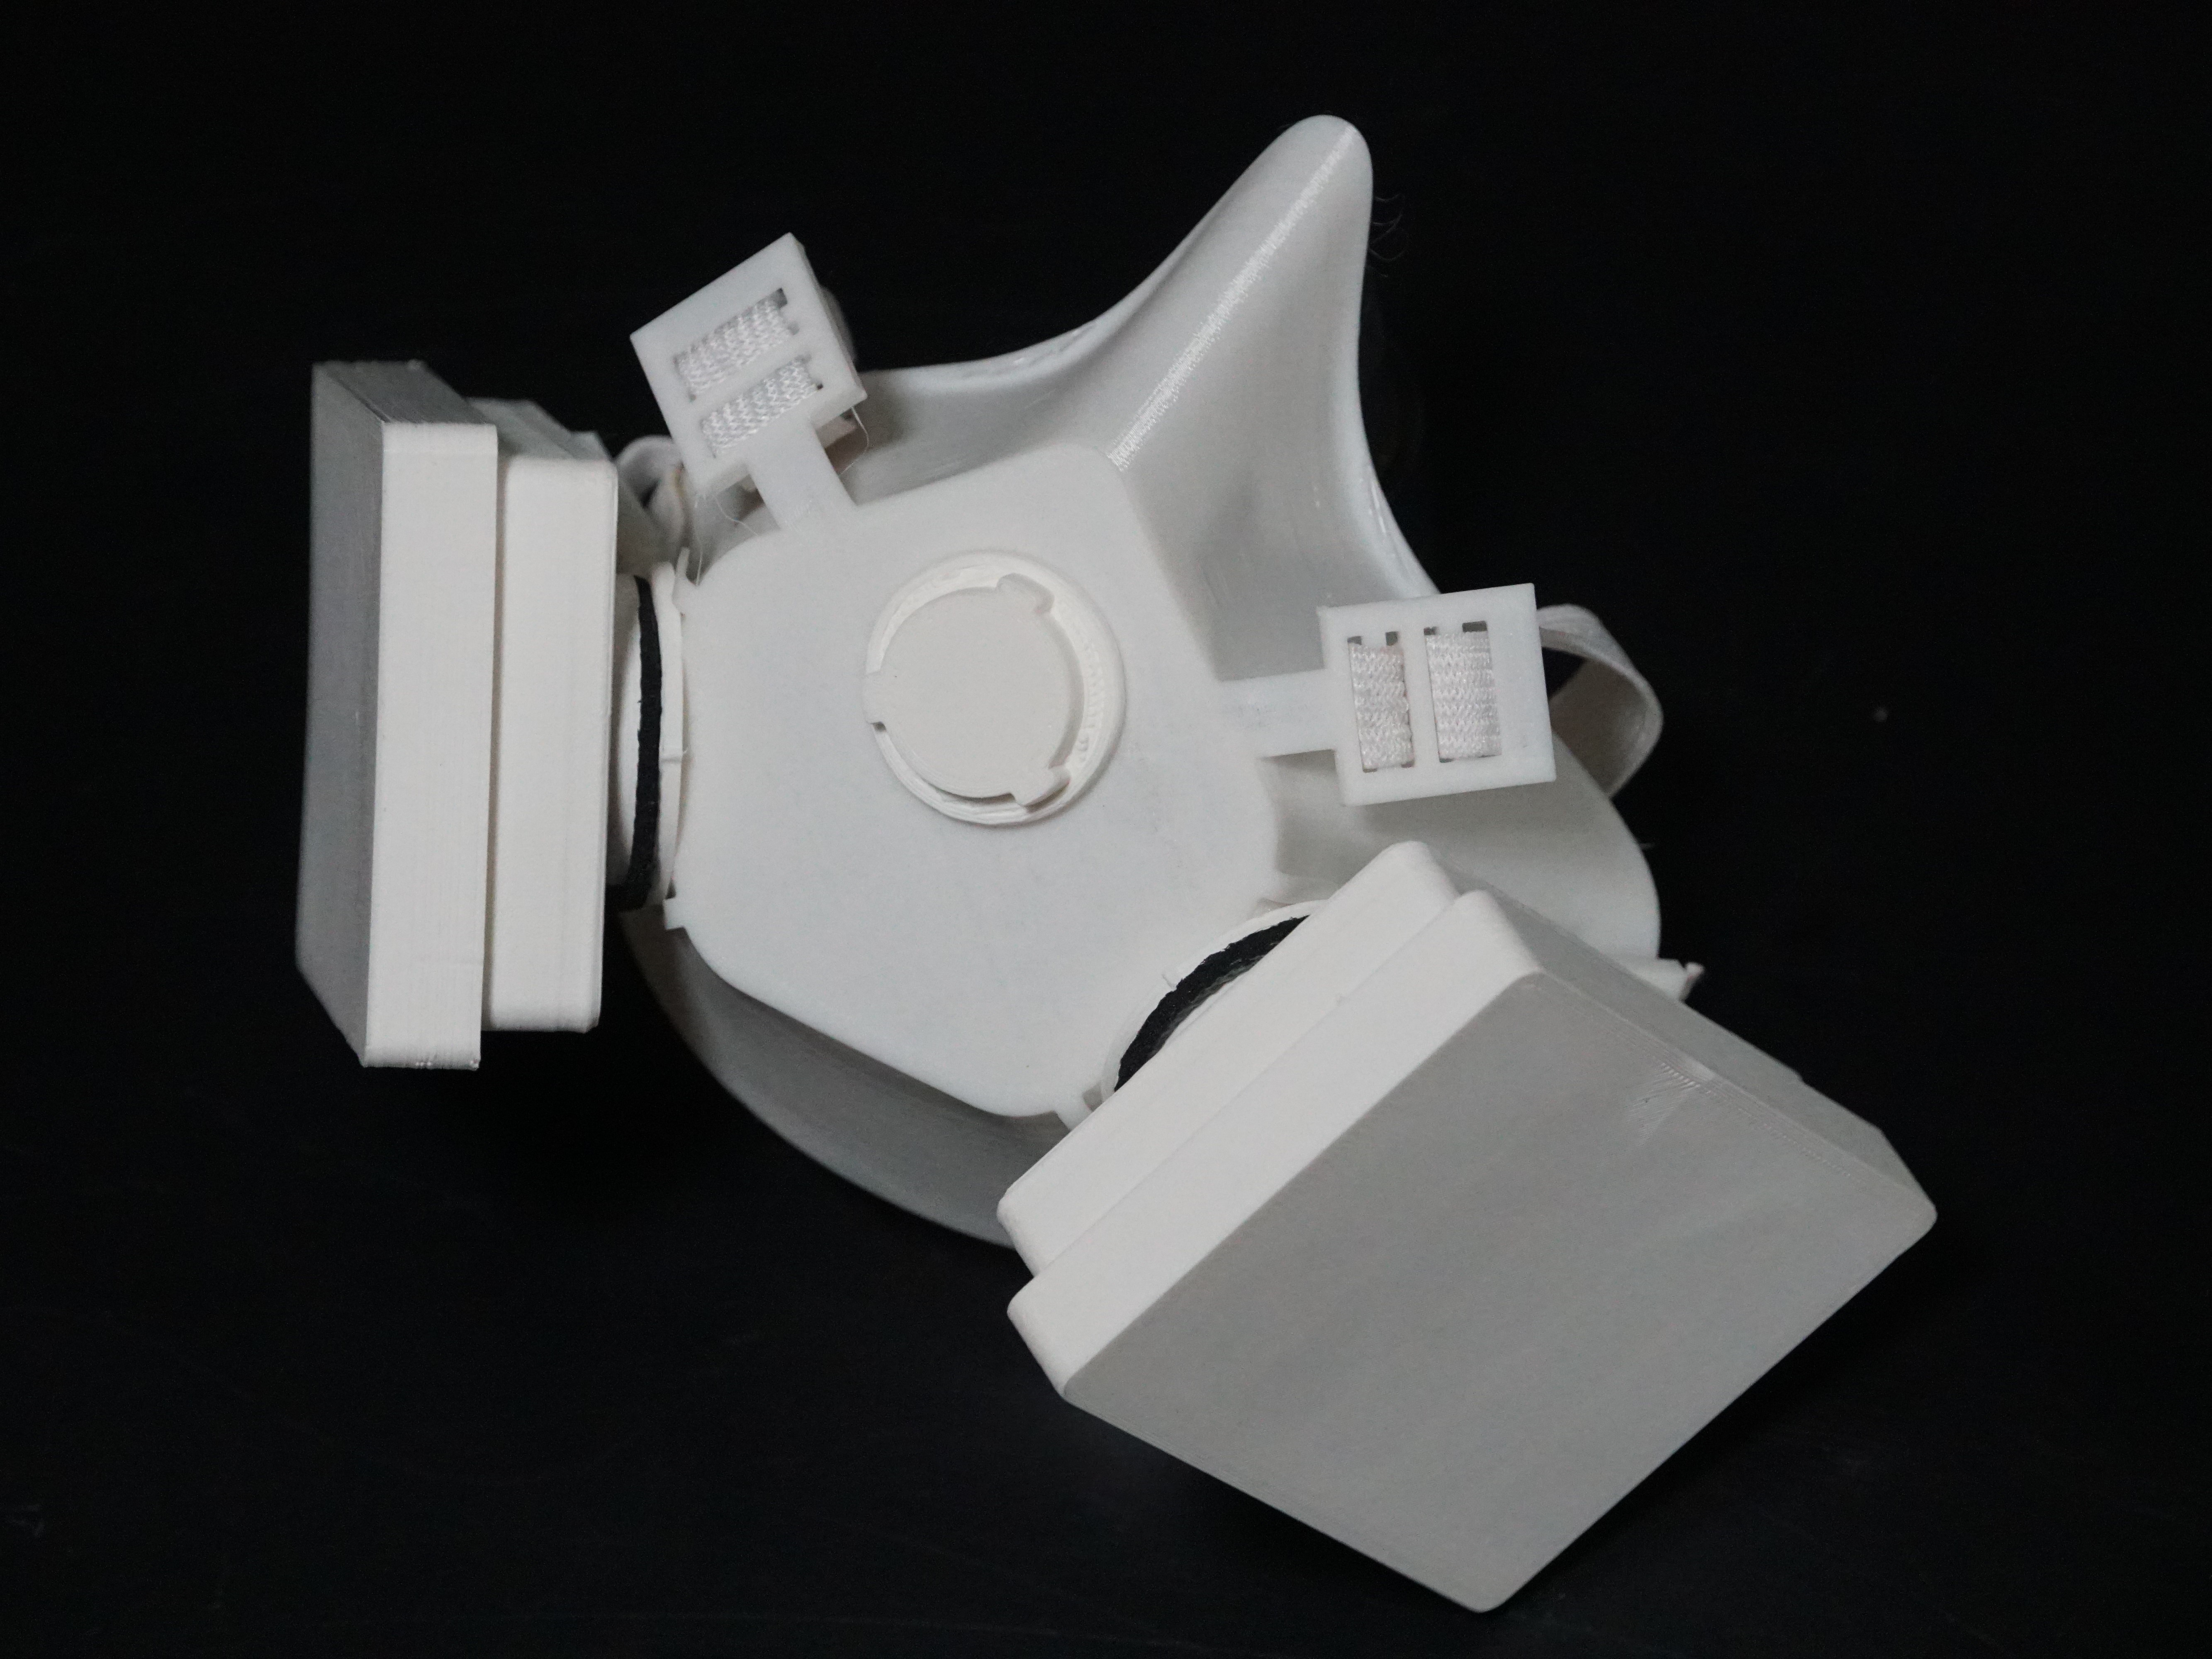
Designed to meet a high comfort factor for extended time use and safe fit seal the JPL Comfort 3D printable respirator can be manufactured and assembled with little expertise and with most typical consumer 3D printers. Modular design allows for intended use adaptability such as single or double cartridge filters for low to high physical activity and support accessories such as a one-way exhaust valve.
This design series can be printed with a rigid or flexible filament.
- Rigid material PLA and PETG
- Flexible material Shore 95A TPU (Ninjatek Cheetah tested)
These are all fairly common and easily printable filaments with most 3D printers. All assembly parts can be made of either but there are advantages for choosing the most recommended filament for each when possible. Any additional fabrication materials are easily found at local hardware or hobby shops.

The rigid housing configuration requires an added peel back weather-seal EDPM rubber to ensure a positive seal and wear comfort. The flexible housing configuration can be printed with or without an added seal edge, the added seal provides greater comfort and positive seal assurance during jaw movement.
Cleaning of these masks is possible by wiping down with disinfectant and disposable wipe. Mask with no added seal can also be washed under submersion of soapy water/disinfectant solution.
Use the table below to help you choose the right housing style for you.

- FDM 3D Printer (direct drive preferred)
- Scissors / Small cutters
- Pliers or 3D Printed tool
- Ruler / Measuring tape (optional)
- 3D printer filament (PLA, PETG, Ninjatek Cheetah TPU) “Housing & Accessories”
- 3⁄8”-1⁄2” Elastic Bands “Headbands”
- Contact solid grip shelf liner. “Component seals”
- EPDM D-profile weather-seal 5/16” wide 1⁄4” thick (required for rigid housing, optional for flexible housing) “Face seal”
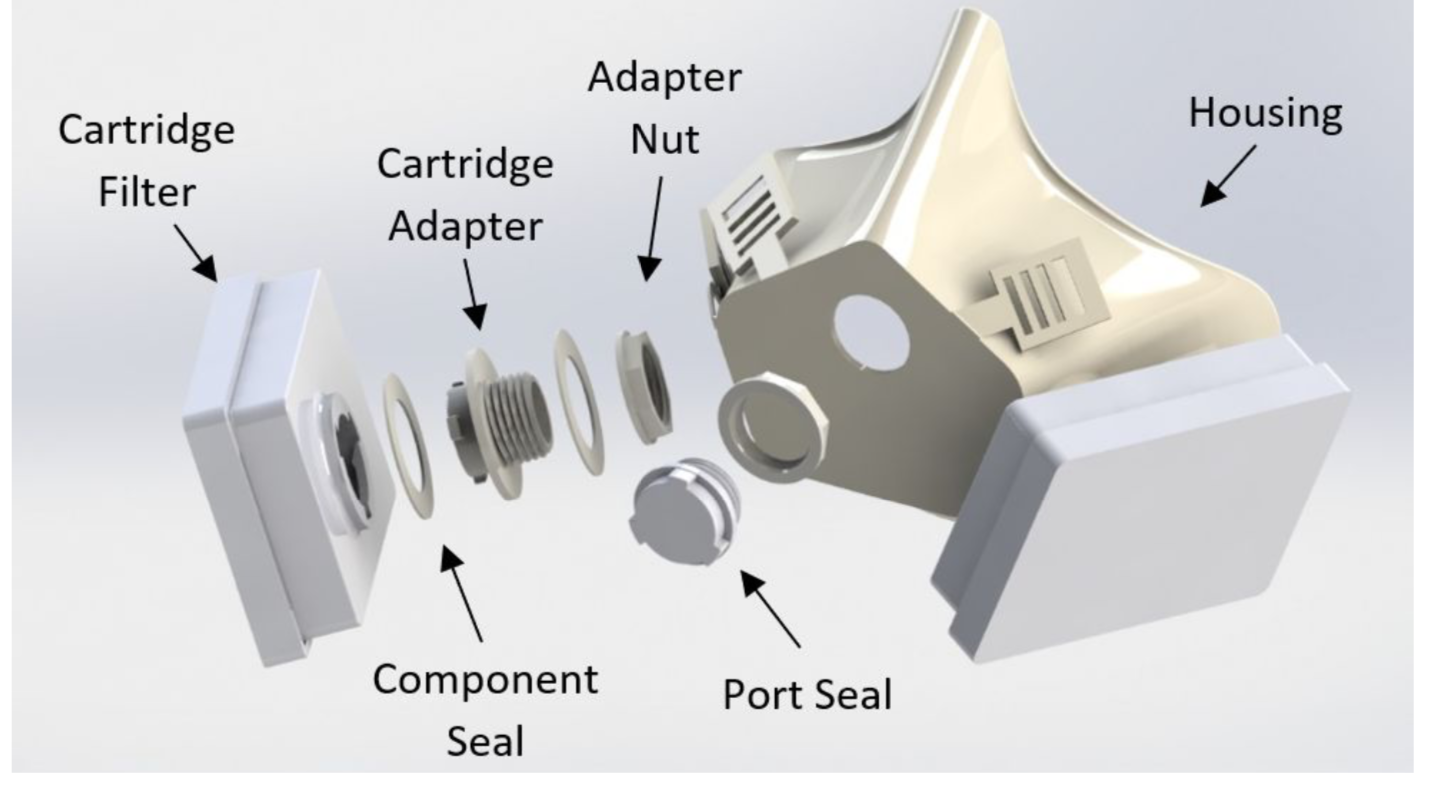
| Component | MultiPort Qty | SinglPort Qty | Manufacturing method |
|---|---|---|---|
| Housing | 1 | 1 | 3D printed |
| Cartridge Adapter | 2 | 1 | 3D printed |
| Adapter Nut | 3 | 1 | 3D printed |
| Port Seal | 1 | 0 | 3D printed |
| Component Seal | 4 | 2 | Hand-cut |
| Headbands | 2 | 2 | Hand-cut |
| Face Seal (optional for flexible housing) | 1 | 1 | Hand-cut |
-
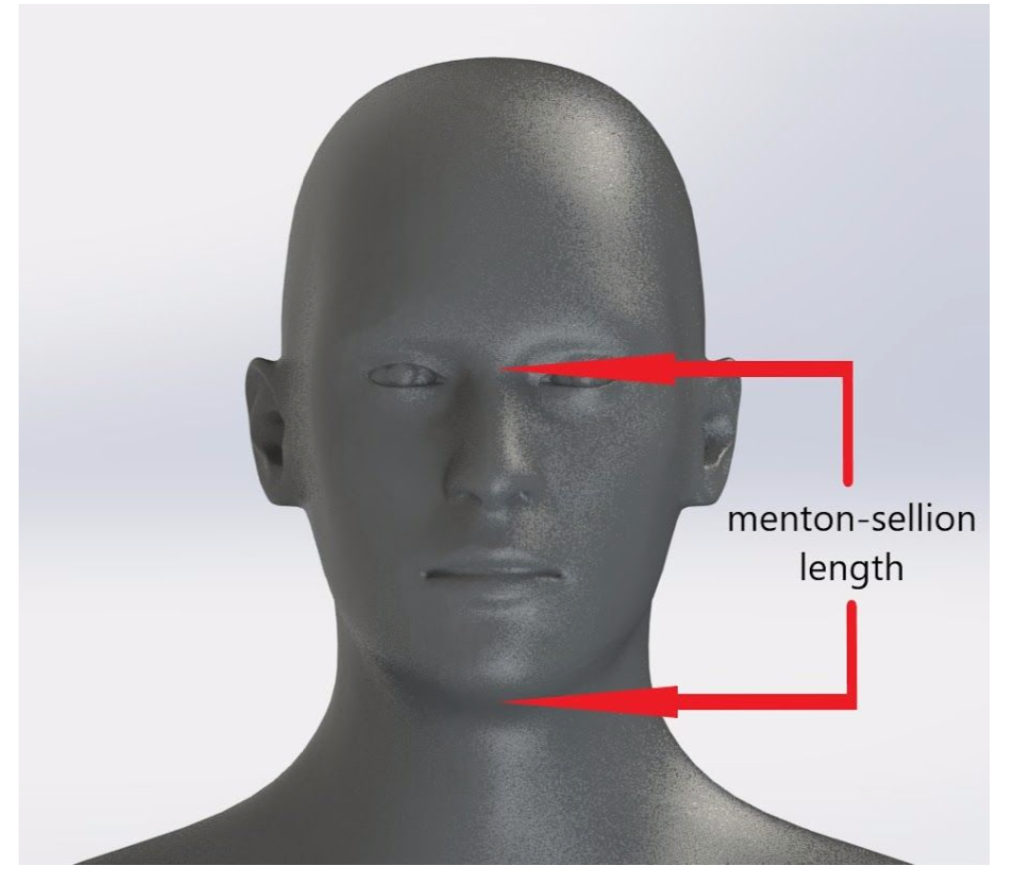
Measure menton-sellion length
Menton-sellion length (face length): The vertical distance from the tip of the chin to the deepest point of the nasal root depression between the eyes.
- Choose the right housing STL according to size and mask configuration
| Menton-sellion Length | Rigid | Flexible with added seal | Flexible |
|---|---|---|---|
| 10cm | ComfortRigid100 | ComfortFlexPlus100 | ComfortFlex100 |
| 11cm | ComfortRigid110 | ComfortFlexPlus110 | ComfortFlex110 |
| 12cm | ComfortRigid120 | ComfortFlexPlus120 | ComfortFlex120 |
| 13cm | ComfortRigid130 | ComfortFlexPlus130 | ComfortFlex130 |
-
3D Print the respirator housing
The recommended material for the housing is shore 95A TPU (Ninjatek Cheetah or similar), as this will allow housing to flex and form to the face maintaining a positive seal during facial movements. To avoid layer gaps and strings, it is recommended that you print a single housing with no other parts on the printer bed. Recommended print settings; 4 perimeters, 5 top, and 5 bottom layers @ 0.20mm layer height with a .40mm nozzle to ensure proper shell seal. If available, use "avoid crossing perimeters" and disable "detect thin walls" to ensure uninterrupted layer prints that may cause stringing or shell gaps. Then follow filament manufacturer guidelines for material print settings. Faster print times may be achieved with a larger nozzle but this design and settings are intended for most common 3D printer configuration.
Print inspection: take a look at your print and make sure there isn't any visible hole, gaps or open layer seems. If so check your print settings it may take a higher flow rate to eliminate any gaps or leaks.
-
3D Print cartridge adapter and accessories
Recommended material for respirators accessories is PETG, this will give you the best mechanical advantages and better heat resistance than PLA, but PLA will do the job and print a bit faster.
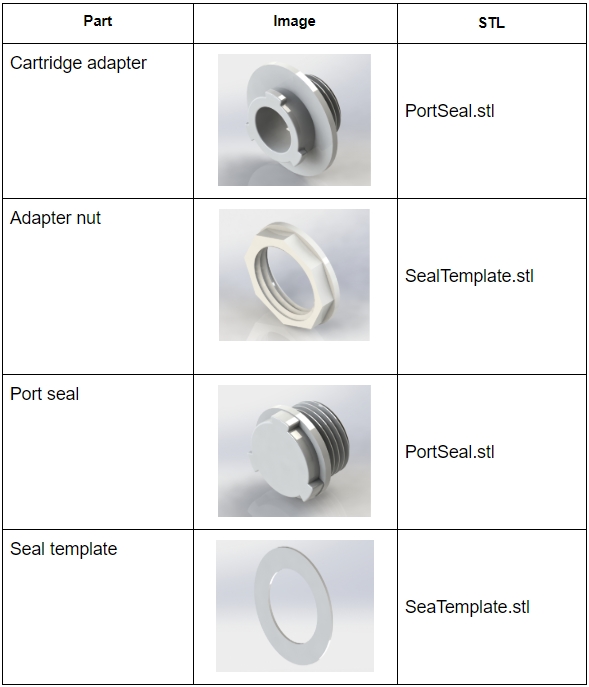
Print inspection: take a look at your print and make sure there isn't any visible hole, gaps or open layer seems. If so check your print settings it may take a higher flow rate to eliminate any gaps or leaks.
-
Cut seals and headbands
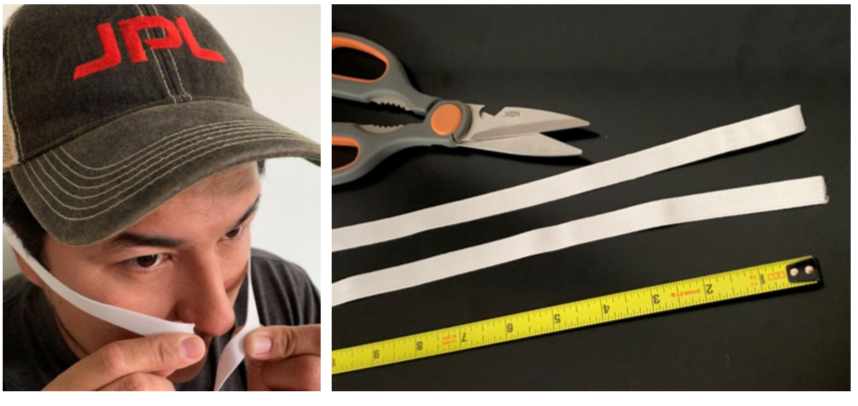
Use the 3D printed seal template to trace and cut the seals, you can fold the seal in half to cut the inner circle.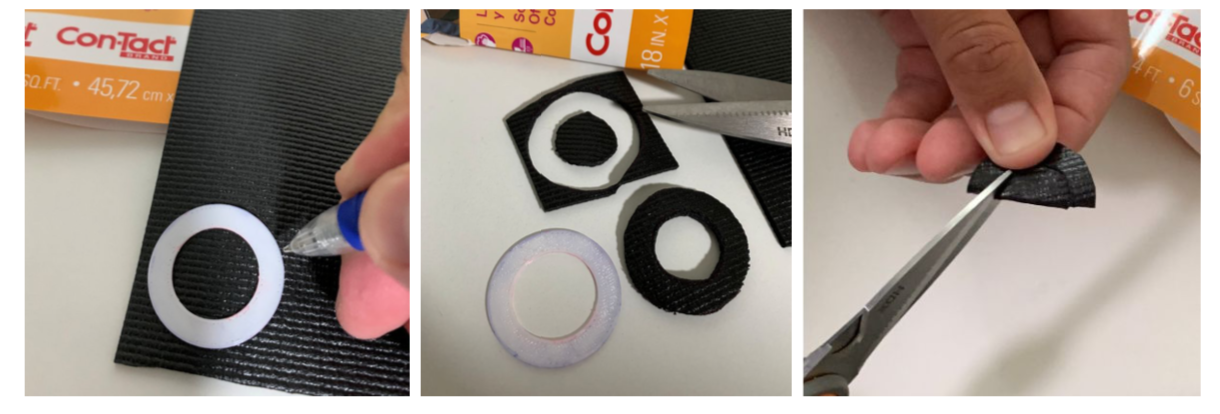 Wrap elastic around the wearer's head without stretching it at nose level and cut two elastics of the same length, alternatively, you can measure out and cut two pieces around 22", headbands can be trimmed after a fit test if necessary.
-
Respirator Assembly
- Gather all pieces
- Install seals on both sides of the cartridge adapters
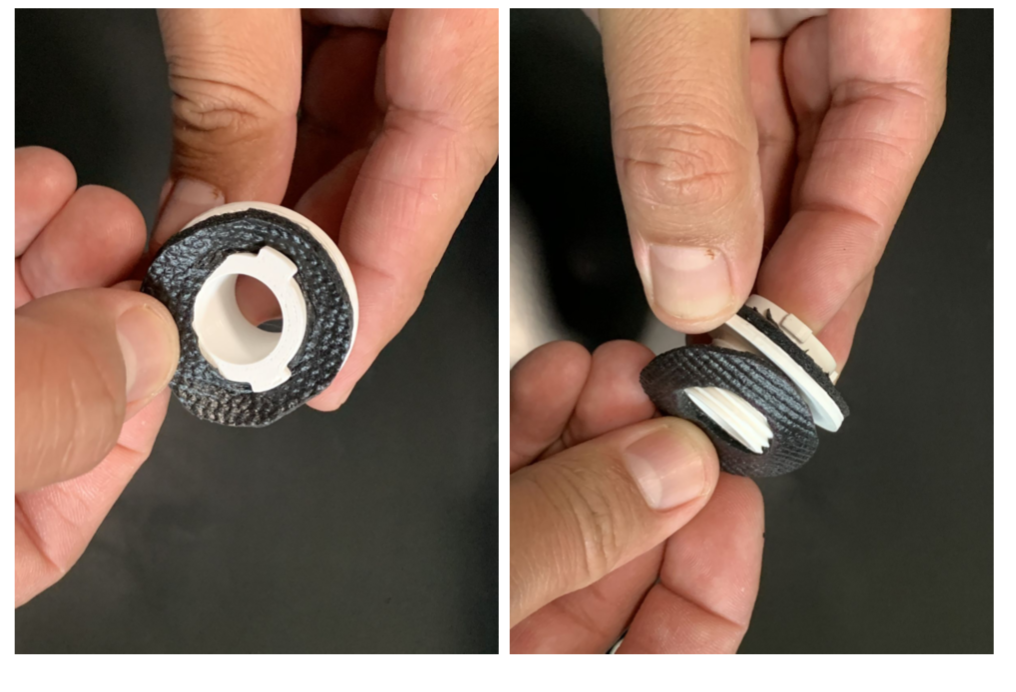
- Insert cartridge adapters to side ports and port seal to the front port.
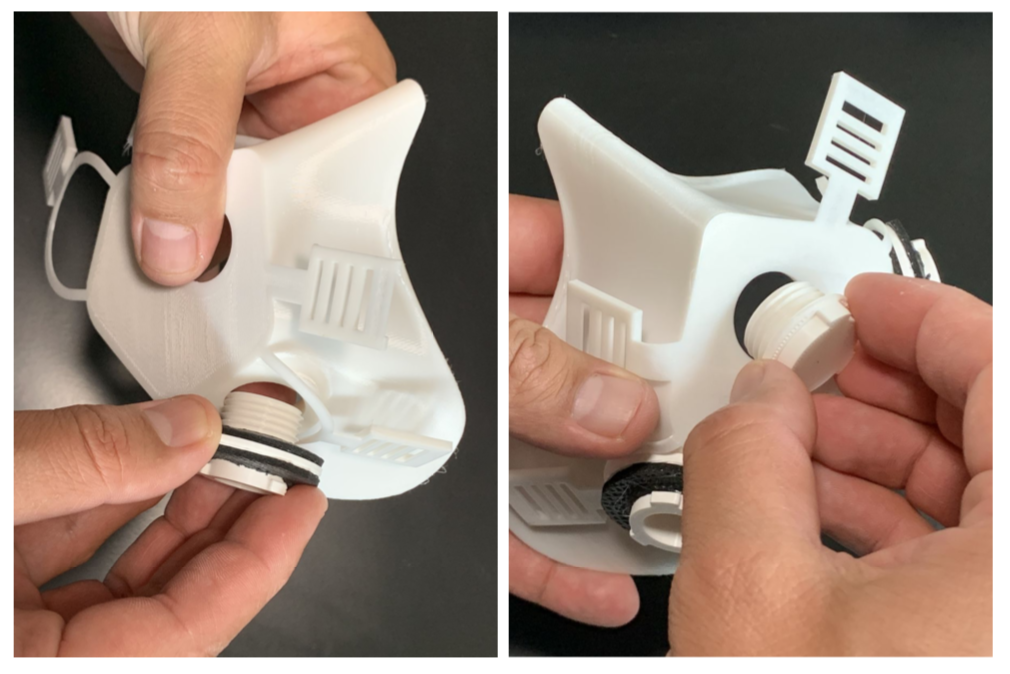
- Install adapter nuts, do not tighten.
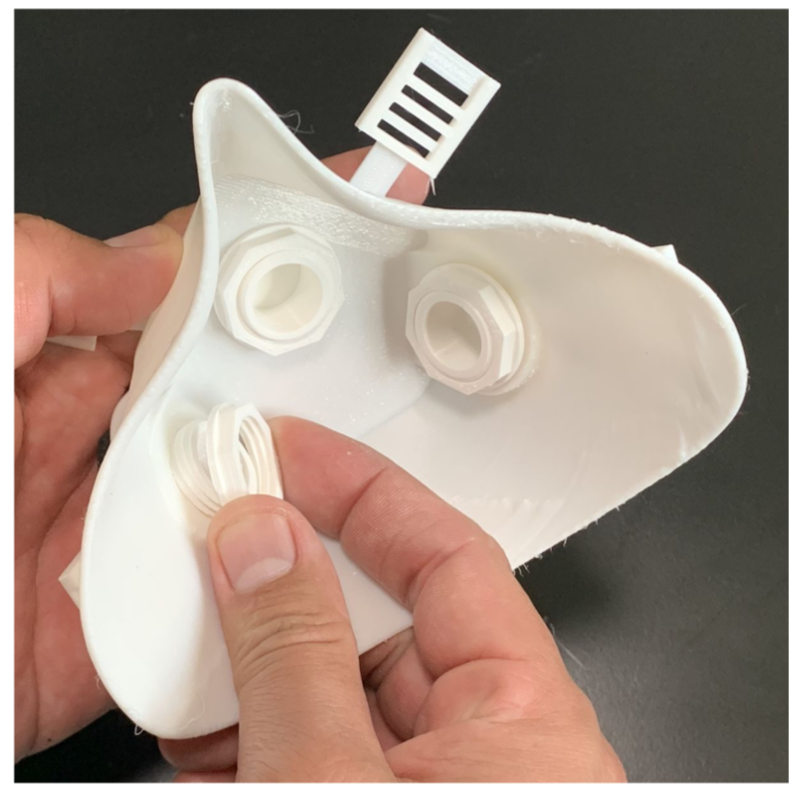
- Orient the smaller cartridge key to the center of the housing, do this by matching the indicator on the cartridge adapter to the mark on the front of the housing
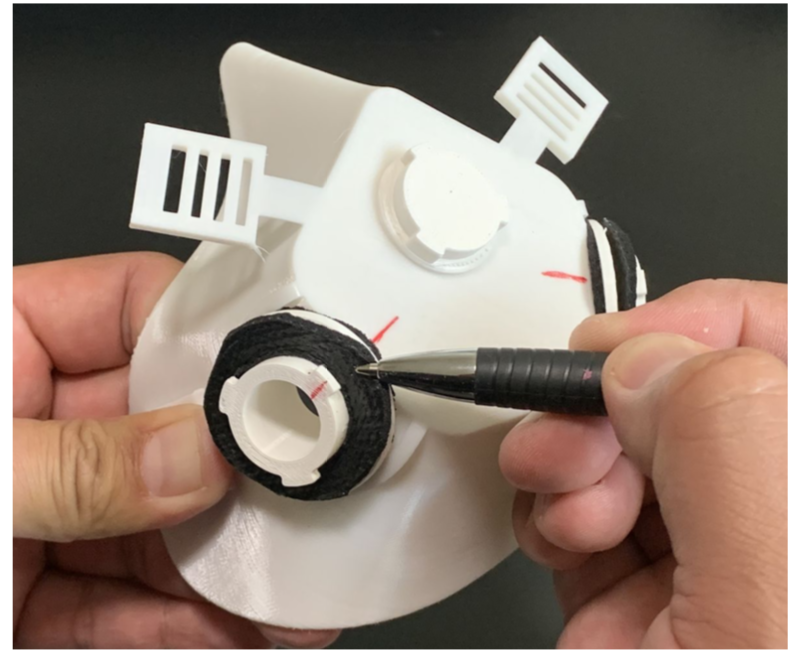
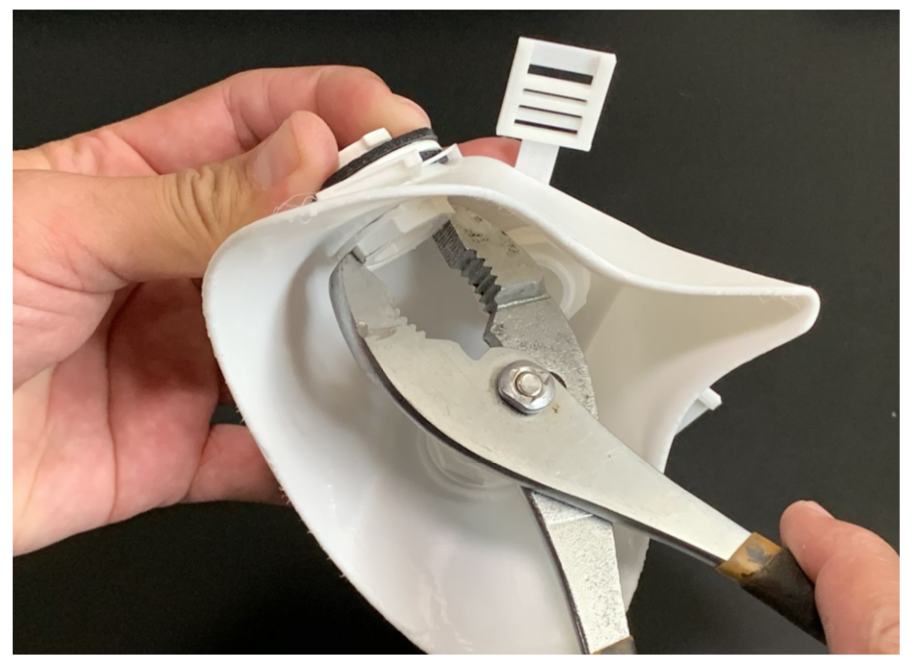
- While holding the cartridge adapter with one hand, tighten the corresponding adapter nut with pliers or 3D printed tool, make sure you tighten sufficiently to prevent the adapter from rotating you can see the seal compress as you do this.
- Install headbands by inserting the long end from the back of the strap mount thru the closest to center slot.
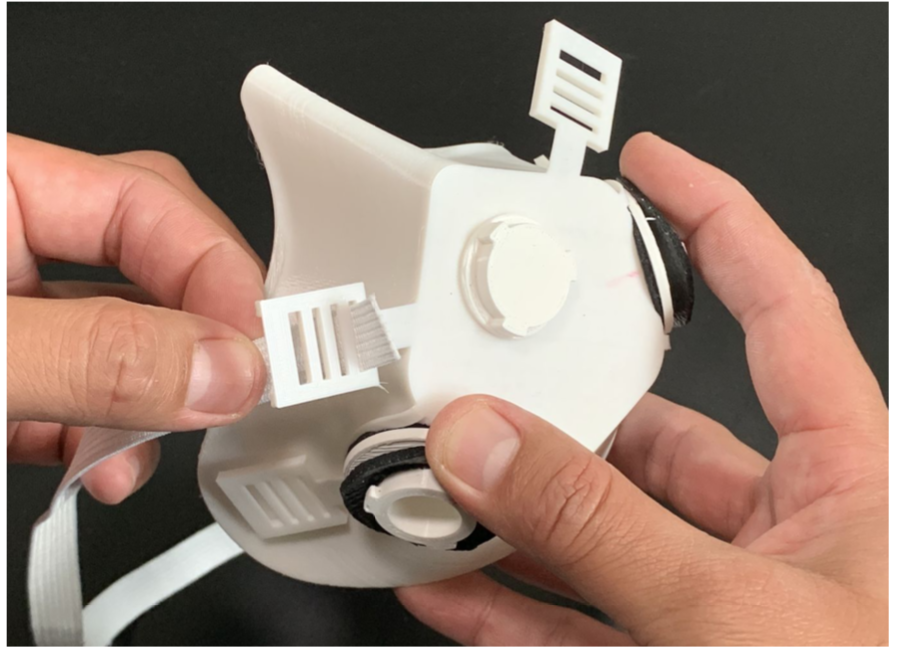
- Continue to zig-zag the strap thru all the slots of the strap mount
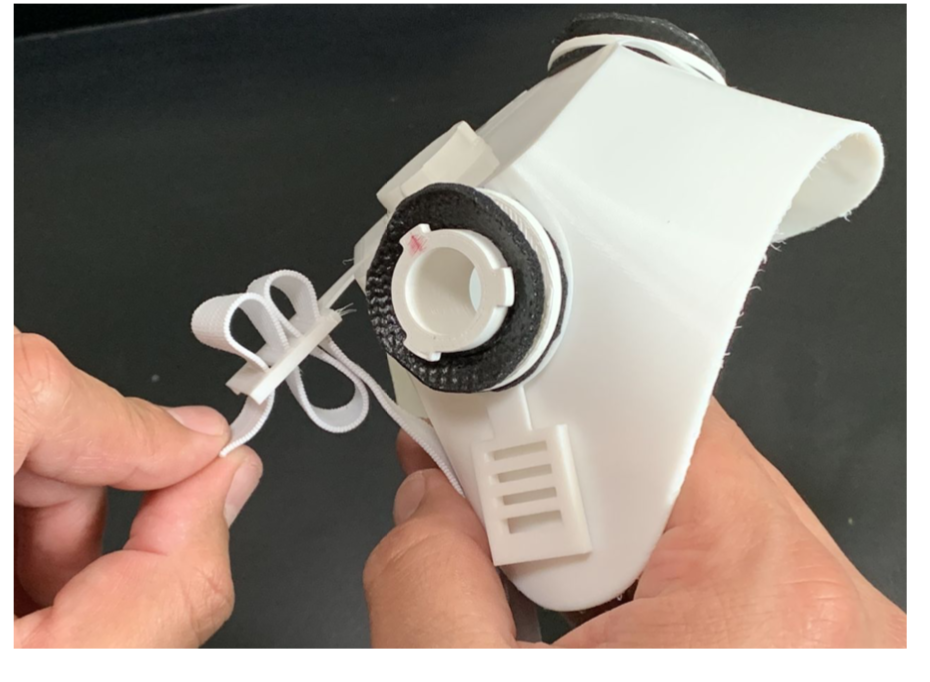
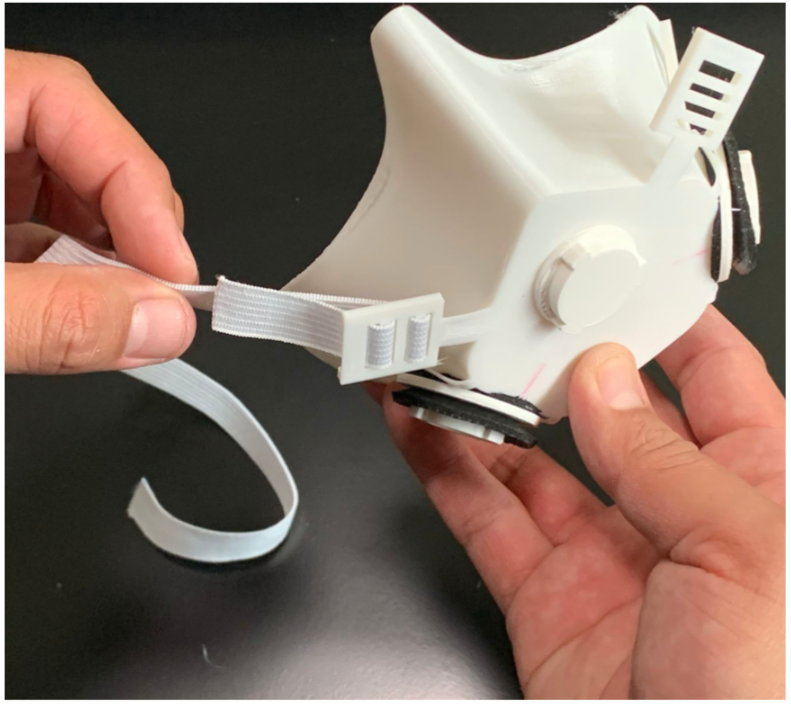
- Insert the other end to the strap mount directly across from each other. Repeat zig-zag insertion.
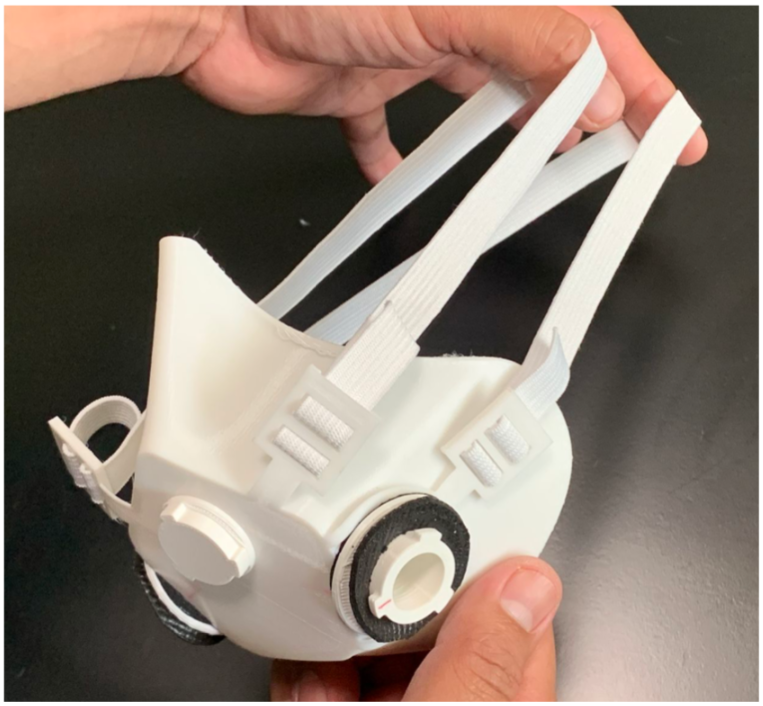
https://github.com/nasa-jpl/COVID-19-respirators/wiki/Custom-Filters-to-fit-the-respirators
- Journey: The JPL designer of the 3D printable COVID-19 Comfort Respirator describes the design journey. https://youtu.be/D9YwYZp7los
- Current design: The JPL designer of the 3D printable COVID-19 Comfort Respirator describes the preferred design. https://youtu.be/MyD2RiscfnQ
- Filter Assembly Video: https://youtu.be/1vwm6cVOomg