Stan is a Haskell STatic ANalysis tool.
⚠️ Note: Stan is in the beta phase. The API is the subject to be changed if required by our needs⚠️
- What this tool is about
- Goals
- Features
- How it works
- Installation instructions
- Usage instructions
- Other tools
- Roadmap
- Users
- Links to Wiki
[Back to the Table of Contents] ↑
Stan is a command-line tool for analysing Haskell projects. It discovers which parts of the code can potentially be improved, and offers suggestions on how to do so. Stan is searching for not only performance or error-prone code pieces, but it also can help with establishing and applying best-practices from the whole Haskell ecosystem.
Although Haskell is a statically typed language, not all properties can be encoded in types. Even though GHC is quite a powerful compiler, it tries to be library-agnostic and provide only language-specific suggestions, while Stan uses the knowledge about the current state of the ecosystem and commonly used libraries.
You will find Stan helpful if you enjoy writing in Haskell, but want more guarantees from your code, not provided by the Haskell type system or GHC.
For a crash course to Stan, watch the talk about Stan, presented by Veronika Romashkina and Dmitrii Kovanikov at the Haskell Love conference.
[Back to the Table of Contents] ↑
Stan design and implementation is driven by the following goals:
- Catch common errors, anti-patterns, performance issues
- Provide meaningful insights on the projects generally
- Point out potential bugs and weak points in the programs flow for users, so they can carefully evaluate each problem with the code
- Help beginners to learn best practices in an easy and informative way
- Generate the report that can be used as a proof of code quality
- Create best in the class and flexible enough interface for usage (including e.g. opt-in and opt-out inspections)
[Back to the Table of Contents] ↑
Stan is a configurable CLI tool. Besides the main feature of analysing Haskell projects statically, Stan has a list of features that make it unique, easy to use and flexible to configure:
- Pretty analysis results, including both HTML and terminal reports
- Suggestions and possible solutions for fixing the existing problems
- Analysing not only Haskell source code, but also information from
the
.cabalfiles - Flexible runtime configuration via TOML and CLI
You can see an example of Stan HTML report hosted online here:
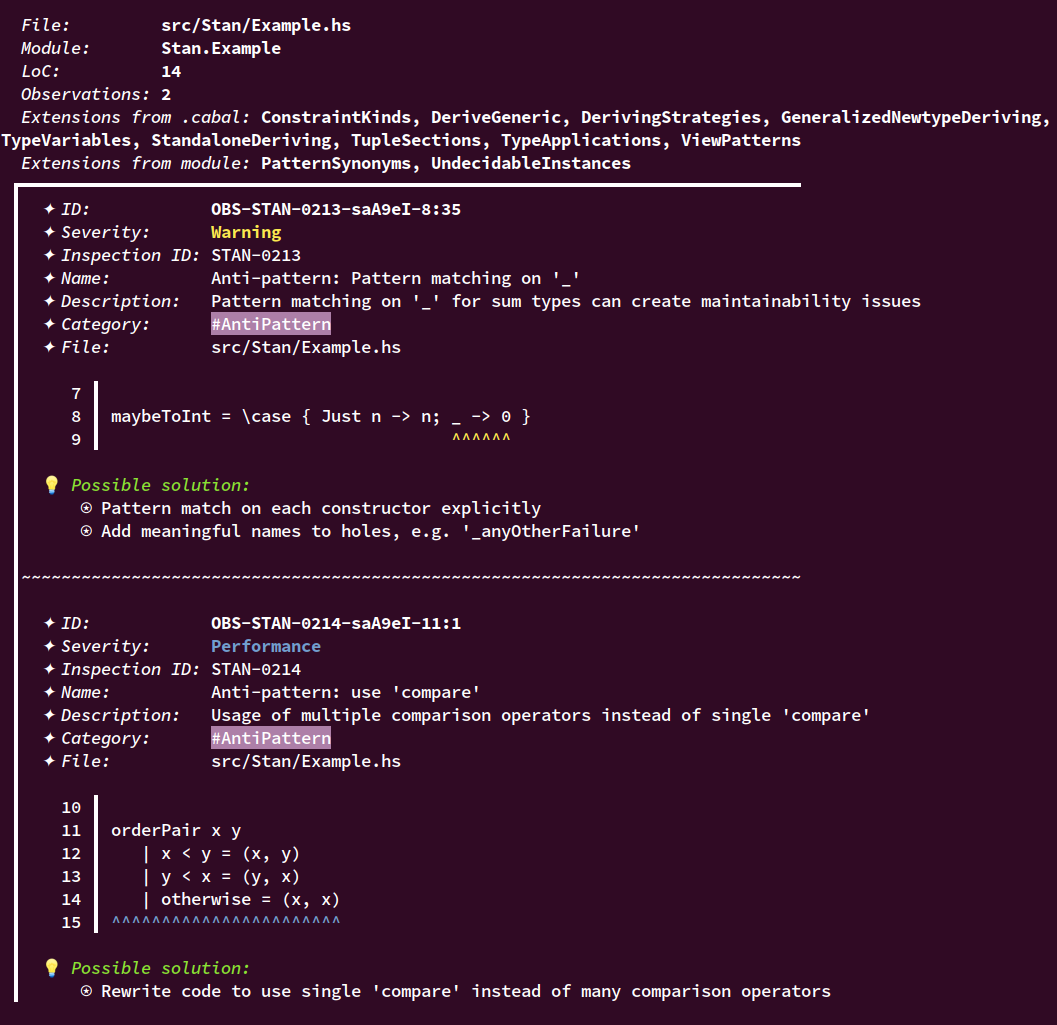
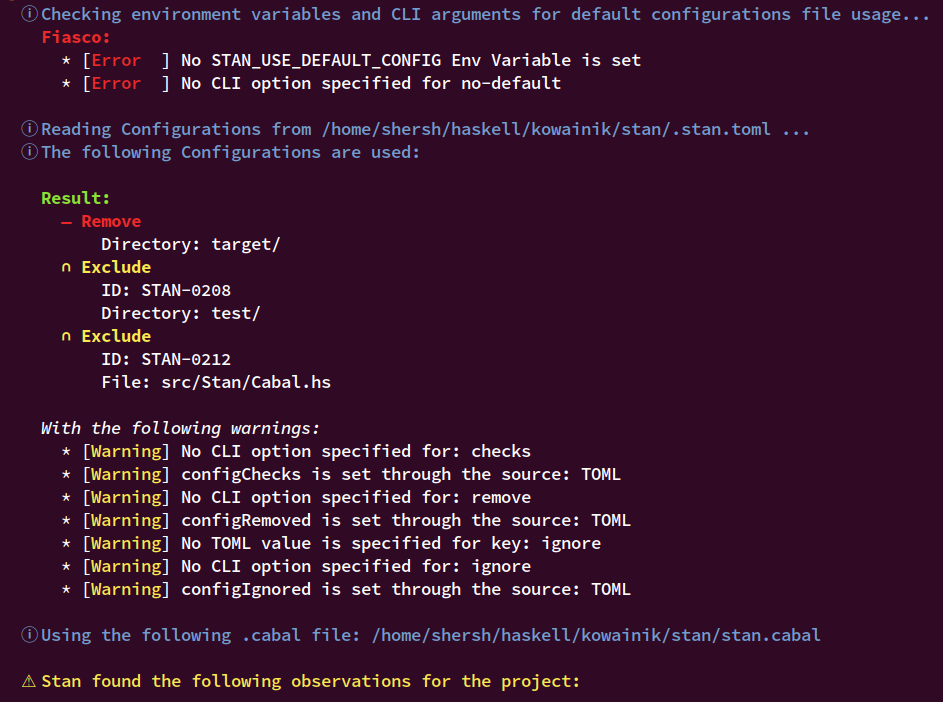
The below example of the terminal output gives you the understanding of what sorts of analysis you can expect from Stan:
[Back to the Table of Contents] ↑
Stan analysis is based on the HIE files — compile-time information about Haskell source code gathered and recorded by GHC. The HIE files contain the Haskell AST, detailed information about each identifier and types of all expressions and sub-expressions. GHC does a huge amount of work when compiling the Haskell projects, and Stan takes advantage of this feature to avoid duplicating the work and focus more on the unique features.
To analyse HIE files easily, we developed an eDSL for defining AST and Type patterns based on the final tagless approach. Stan algorithm traverses HIE AST for each HIE file in the project, and matches every AST node with the given pattern to find potential improvement areas in the code.
Each Stan analysis check is represented by the inspection with the unique ID. Each inspection has a name, description, severity, list of categories, pattern for matching relevant parts of source code and possible solutions to the problem.
When an inspection is casted on the project, it produces zero or more observations —. You can think of an observation as a pair of an inspection and a piece of source code where this inspection was triggered. Each observation is assigned an unique stable ID depending on the source location, so you can refer to them later or ignore.
You can disable inspections or enable them only in particular modules
using check — rules for controlling which inspections to run and
where. Each check has a type (include or exclude), filter
(by inspection id, category, severity, etc.) and scope (file,
directory, everything). Checks can be specified using either TOML of
CLI interfaces. By default, Stan analyses all source files using all
implemented inspections.
If you want to understand Stan terminology better, refer to the glossary:
[Back to the Table of Contents] ↑
Stan takes advantage of the GHC API to provide its analysis. Because of this, Stan and the analysed project need to be built with the same GHC version (for more details see #178). That is why the easiest and most robust way to install Stan is to build it from sources on your machine.
Note: Stan is compatible with the GHC versions ⩾ 8.8
[Back to the Table of Contents] ↑
Below are the steps to install Stan using the Cabal build tool.
You need to have Cabal ⩾ 2.4
First, you need to clone the repository:
$ git clone https://github.com/kowainik/stan.git
$ cd stan
Then, you need to build it using Cabal:
$ cabal v2-build exe:stanFinally, you can copy the resulting executable under the desired location (that should be under the PATH environment variable), like so:
$ cp "$(cabal v2-exec --verbose=0 --offline sh -- -c 'command -v stan')" ~/.local/bin/stan[Back to the Table of Contents] ↑
Below are the steps to install Stan using the Stack build tool.
You need to have Stack ⩾ 2.1.3
First, you need to clone the repository.
$ git clone https://github.com/kowainik/stan.git
$ cd stan
Then, you need to build it using Stack:
$ stack buildFinally, you can copy the resulting executable under the desired location (that should be under the PATH environment variable), like so:
$ cp "$(stack path --local-install-root)/bin/stan" ~/.local/bin/stan[Back to the Table of Contents] ↑
Stan is available on Hackage. You can install the tool from there as well:
$ cabal v2-install stan --install-method=copy --overwrite-policy=alwaysYou can also choose with which GHC version you want to have Stan installed, and optionally add some suffix to the executable name:
$ cabal v2-install stan \
    -w ghc-8.10.1 \
    --install-method=copy \
    --overwrite-policy=always \
--program-suffix=-8.10.1[Back to the Table of Contents] ↑
If you are on MacOS, you can get Stan using Homebrew Kowainik's Tap.
You need to run the following command for that:
$ brew install kowainik/tap/stanNOTE: Homebrew installs the Stan version build with the latest supported GHC version. This means that this version of Stan is working with the project with the same GHC version due to the GHC issues described above.
[Back to the Table of Contents] ↑
If you are on Ubuntu, you can get Stan using Kowainik's PPA.
You need to run the following commands for that:
$ sudo add-apt-repository ppa:kowainik/stan
$ sudo apt update
$ sudo apt install stan
NOTE:
apt-getinstalls the Stan version build with the latest supported GHC version. This means that this version of Stan is working with the project with the same GHC version due to the GHC issues described above.
[Back to the Table of Contents] ↑
You can download binary directly from GitHub releases.
After downloading binary, make it executable and copy it under convenient location, e.g.:
$ chmod +x stan-0.0.1.0-Linux-ghc-8.10.1
$ mv stan-0.0.1.0-Linux-ghc-8.10.1 ~/.local/bin/stan
NOTE: you need to download binary for your specific OS and specicific GHC version you use due to the GHC issues described above.
[Back to the Table of Contents] ↑
Stan works with the HIE files to analyse Haskell
projects. Therefore, Stan requires users to generate HIE files in
advance. Fortunately, it is straightforward to satisfy this
necessity. To produce HIE files, add the following GHC options in your
project's .cabal file to each stanza you want to analyse:
    ghc-options:       -fwrite-ide-info
-hiedir=.hieRecommendation: you can use the common stanzas feature to write the above options only once and enable them in each stanza easily.
Note: here we recommend generating the HIE files into
.hie/folder. As it is the recommendation only, you can specify your own folder as well. But then you will need to runstanusing the--hiediroption with the specified path to yourhiefolder.
After creating HIE files, you can just run Stan on the project:
$ stanto see all found suggestions in your terminal.
If you want to see a more detailed information in a more structured
way, you can generate an HTML report (to the stan.html file) using
the following command:
$ stan reportStan strives to implement the convenient interface, so you can use the tool without configuring a lot in advance. However, the tool also provides various ways to set it up in the way to be the most efficient with your particular use case.
[Back to the Table of Contents] ↑
Stan's work can be configured from the multiple sources (in increasing order of priority):
- Default settings (hard-coded in the library — includes no custom settings)
- Environment variables
- TOML file configuration
- CLI arguments
Stan runtime settings have many parts, and each of them can come from different configuration sources. If some option is specified through multiple sources, the most prioritized one will be used. In addition, Stan helps to understand its own configuration, so it outputs detailed information about each part of the config, what configuration settings were used and how they were set.
[Back to the Table of Contents] ↑
Stan supports TOML runtime configuration in order to customize the work of the tool based on the user's individual requirements. You can use the TOML configuration to disable some inspections, enable them only in particular Haskell modules, ignore some observations or completely remove some files from the analysis.
Specifically, you can use the following variables to set up custom configurations with TOML:
| Variable | Description | Examples |
|---|---|---|
check |
Set up rules to control the set of inspections per scope. | check = [{type = "Exclude", id = "STAN-0101", scope = "all"}] |
remove |
Remove some files from the analysis completely. Stan won't be run in the specified scope at all. | remove = [ {file = "src/File.hs"}, {directory = "folder/"} ] |
ignore |
Ignore specific observation that was found in your project | ignore = [{ id = "OBS-STAN-0001-YrzpQi-11:42" }] |
See Haddock documentation for explanation of how the TOML configuration works and examples of the different use cases.
In case you have a number of TOML files locally, the following rules describe how Stan decides which TOML configuration file to use:
- By default, Stan tries to read settings from the local
.stan.tomlfile in the current directory. So, if you want to adjust the default Stan settings with some custom rules, create a.stan.tomlfile in the root of your Haskell project. - If the local
.stan.tomlfile is not found, Stan tries to read the global~/.stan.tomlfile. Having a global Stan configuration can be convenient, if you work on several projects and want to have the same custom settings by default for all of them. - If you don't have any of the default configuration files, it is still okay. Stan will use its own default hard-coded settings.
- You can specify a path to a specific configuration file using the
--config-fileoption. This custom file will be used in addition to the default TOML config. - If you don't want to use the default TOML configuration, pass the
--no-defaultflag or use theSTAN_USE_DEFAULT_CONFIG=Falseenvironment variable.
[Back to the Table of Contents] ↑
This section describes what is possible to achieve with the Stan CLI. If you have already installed the analyser, you can use
$ stan --helpto get the short information of all possible commands and options in your terminal.
[Back to the Table of Contents] ↑
The main command is the one that actually would analyse the Haskell codebase. There are plenty of configurations and options you can tune for each run (similarly to the TOML configurations):
- Specify the HIE files folder (will use
.hie/otherwise) - Specify
.cabalfiles of your project (will lookup automatically otherwise) - Turn on/off the usage of the default
.stan.tomlconfiguration file - Specify the TOML configuration file to use (will be used additionally to default TOML file if applicable)
- Filter in or out specific files, directories, inspections, categories or severities
- Generate the HTML report file
- Set up the output verbosity
- Choose to have machine readable JSON output instead
Here is the high-level explanation of the available sub-commands:
| Sub-command | Description | Examples |
|---|---|---|
check |
Set up rules to control the set of inspections per scope. | stan check --exclude --category=Infinity --scope-all check --include --id "STAN-0101" --file=src/File.hs |
remove |
Remove some files from the analysis completely. Stan won't be run in the specified scope at all. | stan remove --file=src/File.hs remove --directory=folder/ |
ignore |
Ignore specific observation that was found in your project | stan ignore --id "OBS-STAN-0001-YrzpQi-11:42" |
More precisely the commands and options are described in here:
stan
    [REPORT]
    [   CHECKs {[TYPE option] [FILTER option] [SCOPE option]}
      | REMOVEs {SCOPE option}
      | IGNOREs {ID option}
    ]
    [--hiedir=DIR_PATH]
    [--cabal-file-path=FILE_PATHs]
    [--config-file=FILE_PATH]
    [--no-default]
    [-s|--short]
    [--hide-solution]
    [--json-output]
    [-h|--help]
    [-v|--version]

Description:
  CHECKs           Command to Specify the list of checks
  REMOVEs          Command to Specify scope to be removed
  IGNOREs          Command to Specify the list of what needs to be ignored
  REPORT           Command to generate an HTML Report
  --hiedir=DIR_PATH        Relative path to the directory with HIE
                           files (default: .hie)
  --cabal-file-path=FILE_PATHs
                           Relative path to the .cabal file (can specify many of this option)
  --config-file=FILE_PATH  Relative path to the .toml configurations file
  --no-default             Ignore local .stan.toml configuration file
  -s,--short               Hide verbose output information for observations
  --hide-solution          Hide verbose solution information for observations
  --json-output            Output the machine-readable output in JSON format instead
  -h,--help                Show this help text
  -v,--version             Show Stan's version

Sub-commands options:


  TYPE:
    --include                Include check
    --exclude                Exclude check
  FILTER:
    --id=INSPECTION_ID       Inspection ID to be used
    --severity=SEVERITY      Inspection Severity to exclude or include
    --category=CATEGORY      Inspection Category to exclude or include
    --filter-all             Exclude or include ALL inspections
  SCOPE:
    --file=FILE_PATH         File to exclude or include
    --directory=DIRECTORY_PATH
                           Directory to exclude or include
    --scope-all              Apply check to all files

Report options:

  -b,--browse              Open report in a browser
For example, if you want to run Stan analysis only on a single file, generate the HTML report and immediately open report in a browser, you can use the following command:
$ stan check --exclude --filter-all --scope-all \
       check --include --filter-all --file=src/Stan/Example.hs \
report --browse[Back to the Table of Contents] ↑
You can find the list of all available inspections with description
and additional information on our
dedicated wiki page. However, with the tool you can get
this information easily by using the inspection command. Optionally,
you can see details of a particular inspection by typing the
corresponding inspection ID alongside. You can see more robust
description of the command here:
inspection – Show all Inspections

Usage:
  stan inspection [INSPECTION_ID]

Available options:
  INSPECTION_ID            Show specific Inspection information
  -h,--help                Show this help text
[Back to the Table of Contents] ↑
It is usually convenient to have a proper configuration file that suits your project, which you can reuse each run of the Stan.
But sometimes you need to quickly run the tool with the same settings on another machine where having such files is not possible. Or you want to send the reproducible command, that anyone could execute and get the identical results. For these purposes, we have a special command that allows you to do so:
toml-to-cli – Convert TOML configuration file into stan CLI command

Usage:
    stan toml-to-cli [--config-file=FILE_PATH]

Available options:
  --config-file=FILE_PATH  Relative path to the .toml configurations file
  -h,--help                Show this help text
And for convenience you are able to use the reversed command –– cli-to-toml.
cli-to-toml – Convert CLI arguments into stan TOML configuration

Usage:
    stan cli-to-toml
      [--config-file=FILE_PATH]
      [   CHECKs {[TYPE option] [FILTER option] [SCOPE option]}
        | REMOVEs {SCOPE option}
        | IGNOREs {ID option}
      ]
[Back to the Table of Contents] ↑
-
GHC — Glasgow Haskell Compiler
GHC is the most popular Haskell compiler. As it has access to all steps of the code compilation, GHC can warn about different aspects of your code: non-exhaustive pattern matching, unused variables, etc.
However, it is not supposed to be used as a static analysis tool. It provides errors and warnings as a part of the whole compilation pipeline.
-
Weeder — Haskell dead-code analysis tool
Weeder is a tool that analyses the code but in a very specific and limited case. It helps to eliminate unreachable code in your project. Similarly to Stan, the Weeder tool is also working with the HIE files to get this information.
-
HLint — Haskell Linter Tool
HLint is a linter tool that suggests code improvements to make code simpler.
Unlike Stan, that uses the HIE files for analysis and accesses the complete compile-time info produced by GHC, HLint relies only on parsing, which has its own benefits but also limits its capabilities.
Stan and HLint are complementary tools that have different scopes and goals. There is no intention to duplicate HLint in Stan.
To learn more about the implementation and goals of our project, please read the sections above that describe the Stan project in detail.
[Back to the Table of Contents] ↑
Our plan for the nearest future:
- Opt-in inspections
- Custom users' inspections
- More inspections on potential bugs and performance
- Single-pass traverse on AST
We have much more ideas to work on. See more detailed plan in the dedicated GitHub Project page.
Stan is known to be adopted by the following companies:


