-
Notifications
You must be signed in to change notification settings - Fork 4
development_process
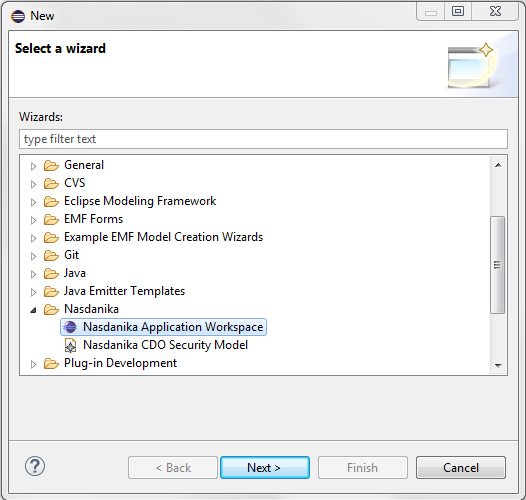
Select File > New > Nasdanika > Nasdanika Application Workspace and click Next.
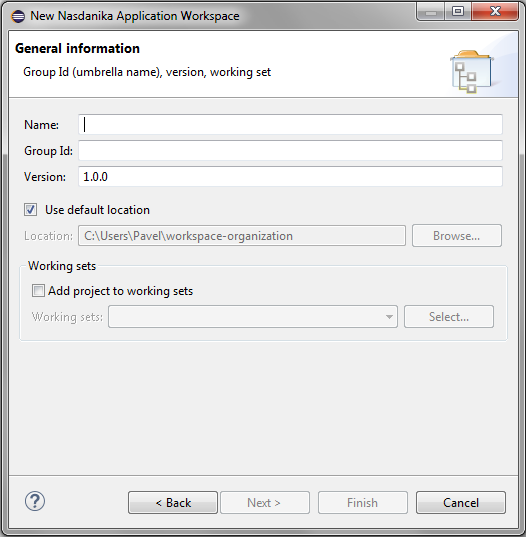
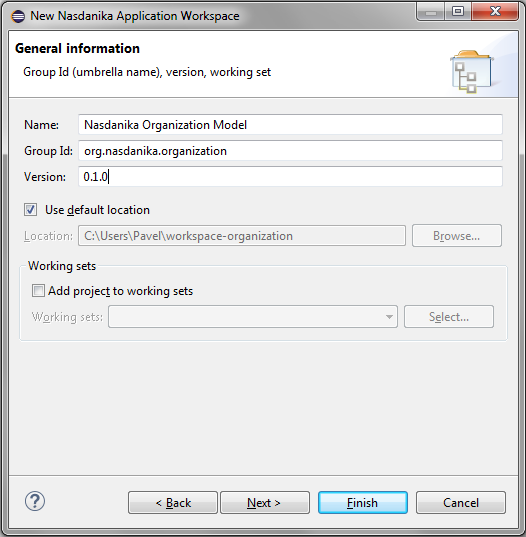
On the General Information page enter application name, group id, and version:
For example:
Then click Next and select application projects to be generated:
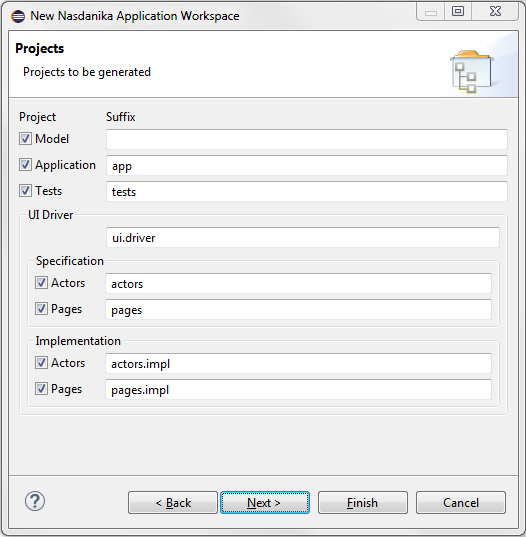
Depending on your development pipeline setup you may generate all projects at once or only some of them, e.g. only UI driver projects or only the tests project. If the tests project is generated with the application project, it is generated as a fragment to the application project. Otherwise it is generated as an Eclipse application.
If the application project is selected then there is one more page to configure application components:
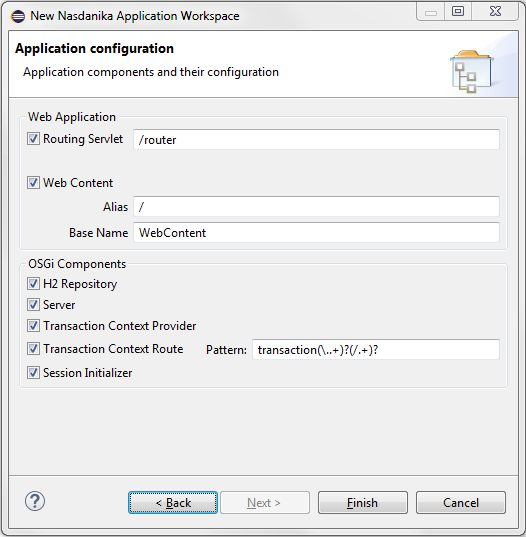
Depending on the architecture and modularity of the system the application project may include all the components or only some of them.
Click Finish. After some processing the wizard will generate application projects.
After project generation pom.xml files may have error markers on them if Tycho M2E connectors have not been installed. Open one of pom.xml files and click on the error message, then click on "Discover new m2e connectors":
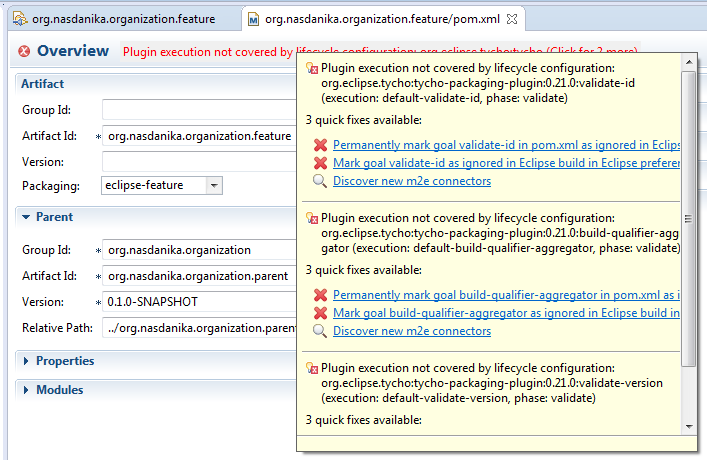
Install Tycho Configurator:
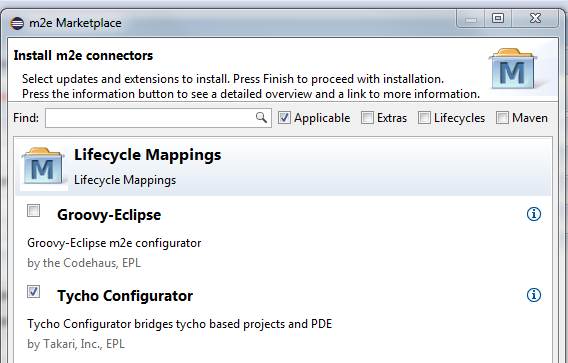
Alternatively, navigate to Window > Preferences > Maven > Discovery and click "Open Catalog" button.
The workspace wizard generates a target platform project and file. Open the target platform file and click "Set as Target Platform" link in the editor.
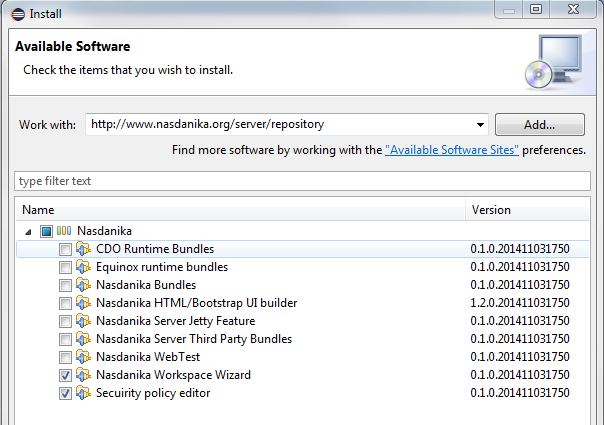
Sometimes the target fails to resolve. If you see error messages in the locations section, click on the location, then click the Edit button, select features, depending on workspace configuration, and click OK.
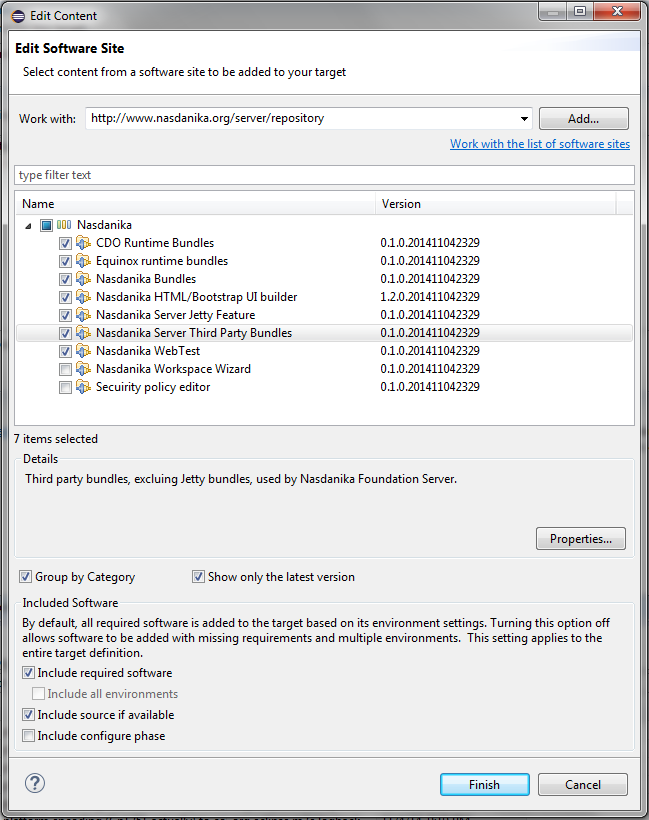
Select:
- CDO Runtime Bundles - if the application uses CDO.
- Nasdanika HTML/Bootstrap UI Builder - if the application uses Nasdanika HTML to build UI.
- Nasdanika Jetty Server Feature - if the application has HTTP interface, e.g. it registers RoutingServlet and has Web content.
- Nasdanika WebTest - if the application features UI tests and UI driver classes.
Open the product definition in the repository project and click "Launch an Eclipse application". You shall see console output that Jetty and other components has started:

Open a Web browser and navigate to http://localhost:8080/<routing servlet alias>/<application dashed name>.html, e.g.
http://localhost:8080/router/orgaization-model.html for default alias and application name "Organization Model". You should see
something like:
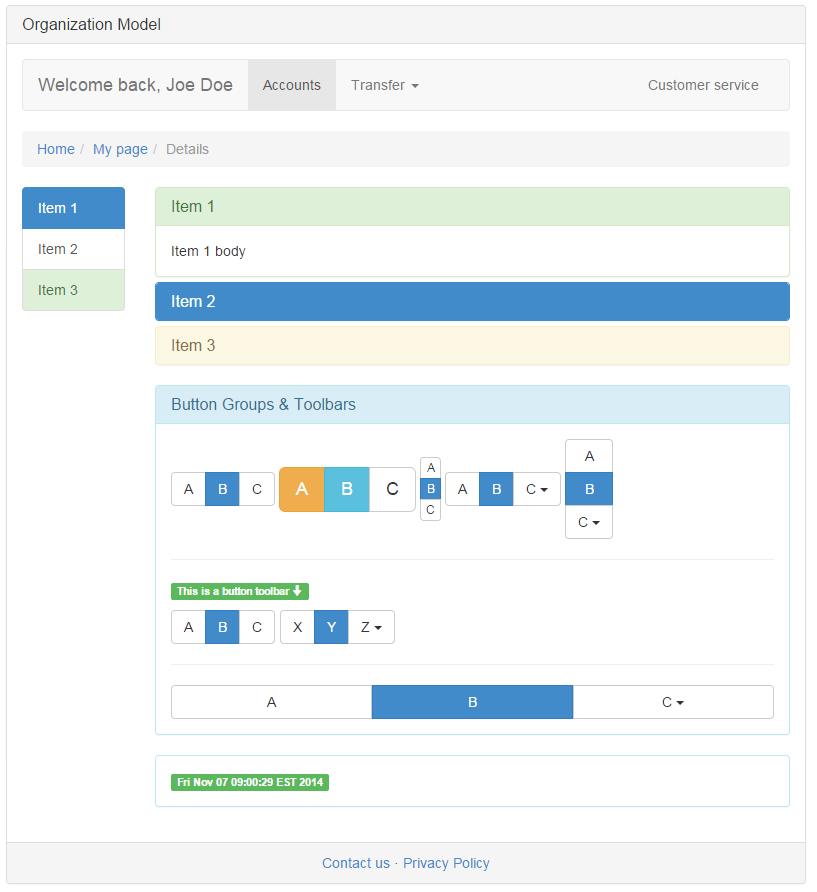
Issue shutdown command in the console to stop the server.
Either from Eclipse or the command line start a Maven clean install build in the aggregator project.
Functional tests executed during the build use Firefox, so you'll either need to have Firefox installed, or install a different driver and modify test code.
Also you'll need Maven installed and configured if you want to run build from the command line.
Open the binary product folder in the repository project, e.g. /org.nasdanika.organization.repository/target/products/org.nasdanika.organization.product/win32/win32/x86_64 for
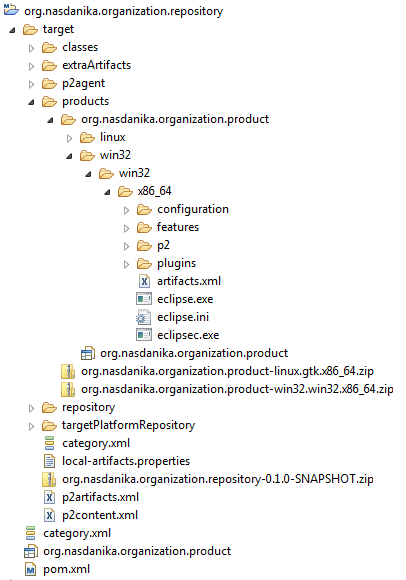
Start eclipse or eclipsec executable. You should see console output similar to what you've seen when started
the product from Eclipse. Open a Web Browser, check that the application works. Stop the server.
The report is located in the tests project under target/nasdanika-web-tests folder. The report cannot be browsed over the file
protocol, so you should publish it to a web server, e.g. local Apache HTTPD.
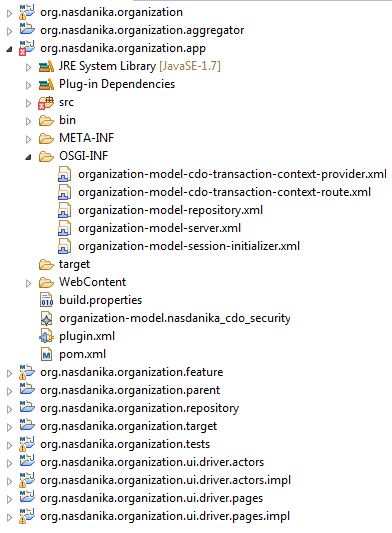
- Model - one or more EMF projects which contains domain models and generated code, e.g. org.nasdanika.examples.bank is a model plug-in.
- Application - a plug-in which defines RoutingServlet extension and also can contain other extensions and component definitions, e.g. org.nasdanika.examples.bank.app. The examples application contains definitions of the credit cards OSGi components, although these definitions could have been hosted by a different plug-in. Also, the session initializer could have been hosted by a different plug-in, e.g. co-located with the model.
- Automated acceptance testing
- UI driver (see Examples Bank UI Driver above and WebTest). In the Examples Bank UI Driver specifications and implementations are stored
in the same repository. However, it is not a requirement and in a general case there may be multiple page and actor implementations for the same specification
residing in their own repositories and having their own release cycles. Also the specification may span multiple bundles.
- Specifications
- Actor, e.g. org.nasdanika.examples.bank.ui.driver.actors
- Page, e.g. org.nasdanika.examples.bank.ui.driver.pages
- Implementations
- Specifications
- Test - fragment or plug-in, launch configuration. See org.nasdanika.examples.bank.app.tests
- UI driver (see Examples Bank UI Driver above and WebTest). In the Examples Bank UI Driver specifications and implementations are stored
in the same repository. However, it is not a requirement and in a general case there may be multiple page and actor implementations for the same specification
residing in their own repositories and having their own release cycles. Also the specification may span multiple bundles.
- Feature - grouping of application or UI Driver plug-ins, see org.nasdanika.examples.feature and org.nasdanika.examples.bank.ui.driver.feature
- Parent - contains parent POM, see org.nasdanika.examples.parent and org.nasdanika.examples.bank.ui.driver.parent
- Target platform - target platform definition, see org.nasdanika.examples.target. Set as the target platform in Eclipse.
- Repository - product(s) definition(s), see org.nasdanika.examples.repository and org.nasdanika.examples.bank.ui.driver.repository
- Tests feature - used by the tests product in the repository project. Tests product and feature are not used by the Tycho/Maven build and are intended to be used for testing from the Eclipse IDE.
Aggregator POM lists modules to be built, see Examples aggregator and UI Driver Aggregator Use the aggregator project/pom.xml to build the workspace with Maven and Tycho.
It is recommended to store sources in a version control system and set up a Continuous Integration job or multiple jobs (say, build the UI Driver and then the application), e.g. using Jenkins.
After setting up the workspace you will have a Walking Skeleton of the application/system which features some basic functionality validated by automated tests and build scripts producing shippable code - bundles in a P2 repository and/or Eclipse products. If you put code to source control and set up a CI job then you have Continuous Delivery and Continuous Functional Inspection right out of the box! Now you can start adding real functionality to the application as described below.
To distribute work between teams and team members you can assign different teams to different projects in the same workspace, or you can generate several workspaces, e.g.:
- Model workspace delivers a model bundle to a binary repository.
- Application workspace uses model bundles from the repositories and delivers the product.
- UI Driver
- Specification workspace(s)
- Implementation workspace(s)
- Tests workspace uses UI driver bundles and delivers a standalone test application.
Then you can set up build pipelines in your CI system.
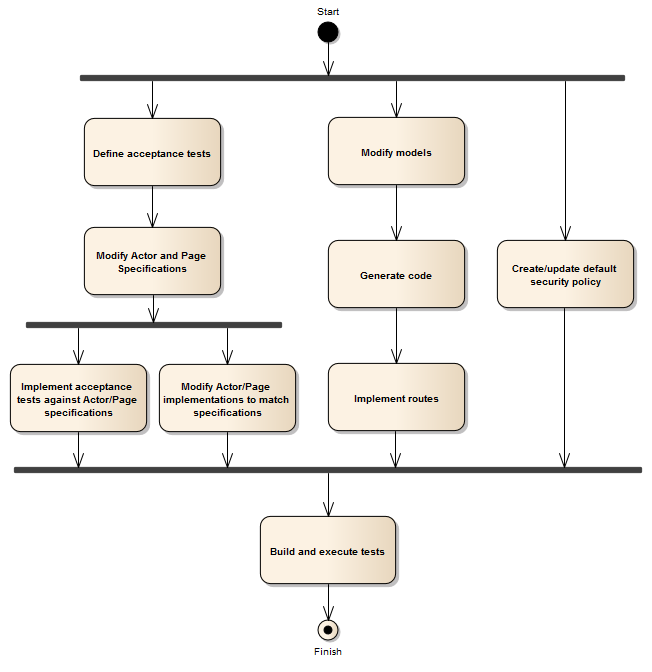
This section lists possible increment steps. Not all of them might be required or executed in the sequence in which they are listed, and some of them may be performed in parallel - e.g. modification of actor/page/test methods and implementation of new functionality in the model.
- Define acceptance tests for the increment, leave them empty - they will be marked as Pending in reports.
- Modify actor and page specifications.
- Implement acceptance tests in terms of specifications, annotate them as Pending until implementations are ready.
- Modify existing models or add new model plug-ins.
- Generate model classes.
- Modify generated classes if required, e.g. add route methods.
- Create/modify default security policy model.
- Add helper/service plug-ins.
- Modify actor and page implementations, remove Pending annotations from tests
- Build the product, tests will be executed as part of the build.
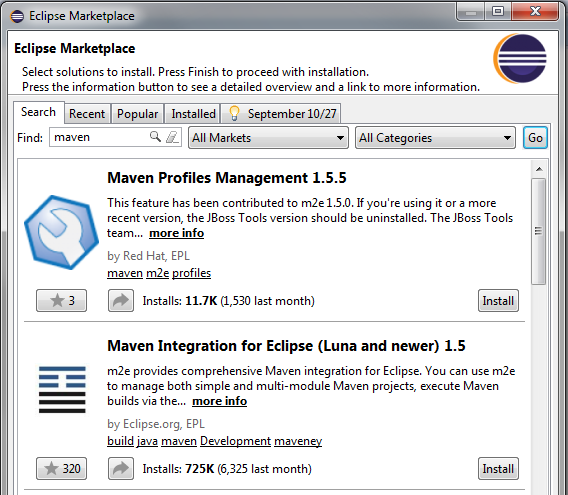
You may install "Tycho Build Tools" from the Eclipse Marketplace to help you manage bundle versions and qualifiers.
Examples and Examples Bank UI Driver can be used as a reference or a template for workspace setup.
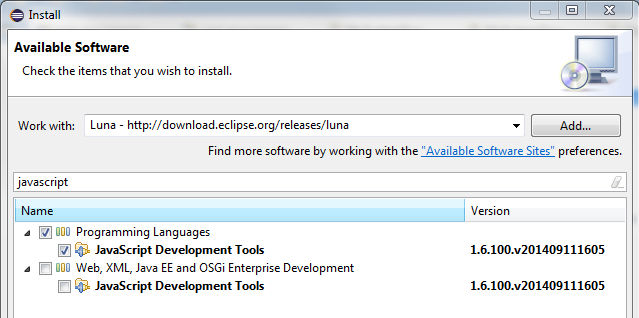
Install "JavaScript Tools" and "Eclipse Web Tools" to get JavaScript, CSS and HTML editors with syntax highlighting and validations.
