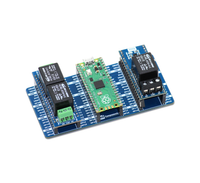
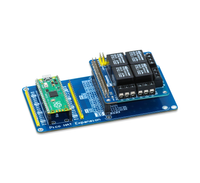
Raspberry Pi Pico Breadboard Kit is a multi-purpose Kit that consists of a “400 points half-size breadboard” on top, a Programmable Buzzer, 4 Programmable LEDs, 4 Push buttons, and dedicated 5V, 3v3, and GND pins at a single place.
Kit is compatible with all Raspberry Pi Pico variants - Pico, Pico W and latest Pico 2
- Raspberry Pi Pico Breadboard Kit (Buy it from : https://shop.sb-components.co.uk/collections/latest-collections/products/pico-breadboard-kit ) OR
- Raspberry Pi Pico 2 Breadboard Kit (Buy it from : https://shop.sb-components.co.uk/products/raspberry-pi-pico-2-breadboard-kit )
- USB Cable
- Few Jumper Cables
- Push buttons : Not pressed = Logic 0 , Pressed = Logic 1 (INPUT)
- Led : LED On = 1, LED Off = 0 (OUTPUT)
- Buzzer : Buzzer On = 1, Buzzer Off = 0 (OUTPUT)
-
If your Pico is already loaded with boot firmware, you can skip this and proceed to step 2 for testing examples.
-
To determine whether firmware is already present, simply connect your Pico to your laptop without pushing the boot button; if no additional device is detected and only some sound is heard, firmware is present.
-
If you connect the pico to a laptop without pushing the boot button and it displays a mass storage device named "RPI-RP2" as seen below, the firmware is not installed.
-
If BOOT firmware missing, then you will have to add MicroPython firmware in Pico of Breadboard kit. Select and download suitable firmware for your corresponding pico board,
- For Pico => Pico_firmware.uf2
- For Pico W => PicoW_firmware.uf2
- For Pico 2 => Pico2_Firmware.uf2
-
First, you need to Press and Hold the BOOT button, and then, without releasing the button, connect it to PC/laptop using micro usb. Check below image for reference,

-
Now your device is in boot mode, and you will see a new mass storage device named "RPI-RP2" for Pico/Pico W and "RP2350" for Pico 2 as shown in the below figure.
-
Drag and drop the MicroPython "Firmware.uf2" file downloaded previously for pico from this github onto the RPI-RP2 or RP2350 volume. Reference image shown below how to transfer any UF2 file or you can copy paste as well. Device will reboot and you are now running MicroPython.


-
Once Boot Firmware loaded now we can proceed to test sample example scripts on breadboard kit with Pico, please below steps for these.
-
Connect Raspberry Pi Pico on female header of Pico Breadboard Kit.
-
Connect USB cable on Raspberry Pi Pico USB port.
-
Use jumper cables to connect Switches , Led's and Buzzer with Raspberry Pi Pico GPIO headers.

Connections used here, GP0 -> LED 1 , GP4 -> Button 1 & GP8 -> Buzzer
-
Now use example code "main.py" from pico breadboard kit's github repository in any micropython supported ide (preferred thonny ide). Find more codes in examples folder
-
Download and open code in Thonny IDE, transfer main.py and PicoBreadboard.py file into Pico/Pico W.
-
Similarly you can try other examples just make sure to save whatever script using as main.py into Pico for standalone execution.

-
Choose interpreter as MicroPython (Raspberry Pi pico) with suitable com port shown.
-
Click on green play button to run example on Pico Breadboard Kit.
Note: External components can be connected with Pico Breadboard kit via 400 points breadboard.
- MicroPython getting started for RPi Pico boards
- Getting Started with Pico
- Pico/Pico W - RP2040 Datasheet
- Pico 2 - RP2350 Datasheet
- Pico-2-channel-expander - Enable to interface multiple Pico HATs
- Raspberry Pi Pico GPIO Expansion Board - Breakouts GPIO pins for easy access
- Raspberry Pi HAT Expansion Based on Pico - Allows to use Raspberry Pi HAT with Pico
This is open source product. Kindly check LICENSE.md file for more information.
Please contact [email protected] for technical support.


