HowTo Guide: From Benbox to LaserGRBL (LX-NANO/Nano-328p, CH340, Benbox, DCCduino) #1213
Replies: 2 comments
-
|
Fantastic! This is a wonderful contribution of know-how that you wanted to share in full community perspective. About the Homing known issue: just disable homing feature in grbl configuration ($22 = 0) to get rid-off the homing button. |
Beta Was this translation helpful? Give feedback.
-
|
Thanks man! My next step is to provide entries for the material database for the nano based on the findings. But as a true beginner I need some experience ande right now in the lockdown it's not that easy to get a lot of differnt materials without online orders.
|
Beta Was this translation helpful? Give feedback.

-
Hello Folks!
I wanted to share my path to getting one of those cheaper Benbox engravers setup and running pretty well with LaserGRBL. I struggled first with firmware and connectivity issues but it seems it is all pretty much sorted out now.
Reason
The reason behind going with LaserRGBL instead of the out-of-the-box Benbox 3.7.99 software is, that I get a wider range of supported file types. Namely
.ncand.svg. SVGs are my go to format for non-picture images such as schemes, text etc. You know the deal, vectors are great.Also it seems like the LaserGRBL software has some much more advanced rasterization, dithering and image transmutation capabilities.
The Engraver
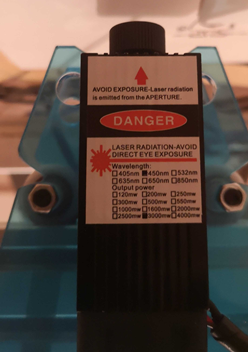
The engraver is a 450µm blue laser with 3000mW of output power.
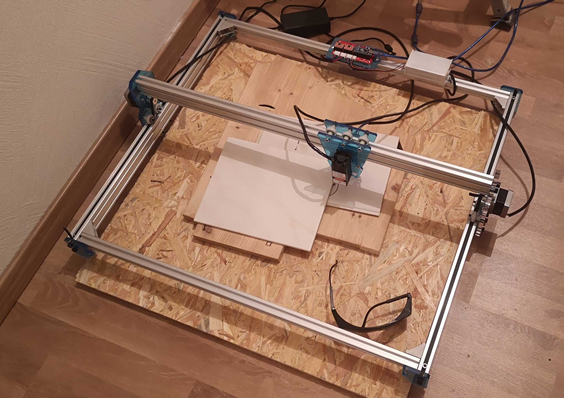
The laser is driven by 3 stepper motors for a 2-axis operation and needs to be manually refocused if the distance to the material that is to be engraved changes. The laser has a bed of 500x600mm and therefore a usable area of approx. 400x500mm.
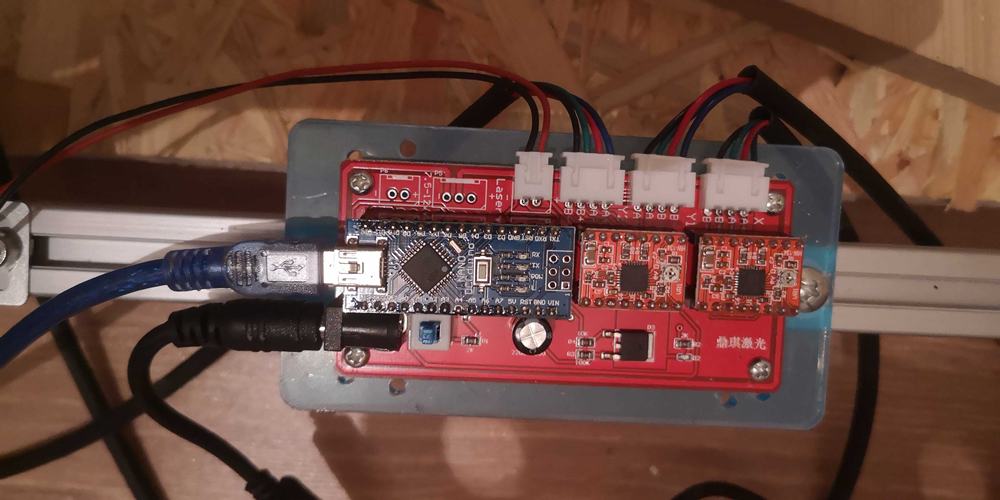
The chip that drives the power board, laser and motors is an Ardunio Nano. From what I found out it's a chinese replica of an original Ardunio as it is using the CH340G chip. (The chip can not be seen here as it is on the botom side of the Arduino).
Installing Benbox and getting rid of it
Since the engraver came OOTB with the Benbox software I went with it and installed the CH340 driver and Benbox according to the instructions (Youtube video for assembly and installation
, another video on assembly and A Google Drive link with all the stuff that was on the CD).
Benbox ran fine but it lacks some functionality.
So after some time figuring out Benbox and testing it's capabilities I deinstalled it and rebooted. Rebooting is quite critical since it seems that the software is not cleaning up well and somehow the COM port that is assigned to the driver is not usable in LaserGRBL without a restart.
Flashing the GRBL 1.1h Homing XY firmware
Well before flashing you obviously need to install LaserGRBL. Did that. Straightforward. You can also skip installing Benbox and also install the CH340 driver from the LaserGRBL Tools menu. This one also seems to be newer (2019).
Next step to getting LaserGRBL working with the Benbox laser is to flash the GRBL firmware. I used the LaserGRBL integrated flashing tool and those settings:
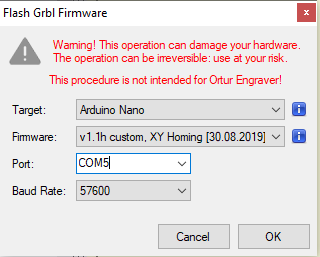
After a succesful flash I was able to connect to my now GRBL compatible engraver via a Baud Rate of 115200 (this seems to be important as well as all other settings do time out (consult the log at ? -> Open session log)
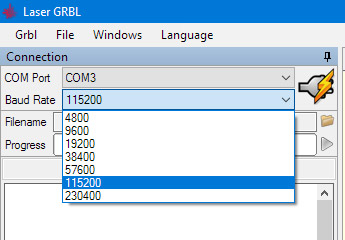
The succesful connection is acknowledged in the status window with
This is also documented here: https://lasergrbl.com/usage/arduino-connection/
GRBL Settings for operation
After getting a succesful connection to the device I followed this guide which was linked here and worked my way through it
Complete Config file
After quite some testing I figured out this GRBL configuration for the engraver to work really nicely. it's quick, precise and cuts/engraves crisp:
The important settings in my opinion are:
Laser Timings
Allthough the are the defauts they work well.
Inversion of directions to align with jog arrows
It seems from wiring and setting up the device I may have put the controller at the wrong location. So per the PDF and this section
 I managed to get to this setting to invert both X and Y to have the directions applied the right way.
Stepping motor speeds
Allright this was a tricky one. The Benbox software has a default feedrate of 1000. I put is times 4 since all the prints I tried came out 4x the actual size. I meassured the engraved outputs and made the adjustmenst to the feedrate and the motor stepping resolution.
Motor step resolution
This is basically where I came up with the 4000 from above. Benbox comes with a pixels per mm setting of 320. With this setting when I jogged 1 step, it made way of ~4mm. So the best I came up with by messuring different lengths was the 82 above.
320 / 84 is about 4. So I upped the feedrate from 1000 to 4000.
Motor acceleration
Not much thought went into this. 164 just provides a snappy and precise feeling when operating the engraver.
Laser power defaults
This is the default I believe but works well
PWM support aka "grey"
With this setting enabled the laser can modulate the power. Instead of only being on and off it has 256 different intensities which LaserGRBL can use if you setup the rasterization with
M4mode. The setting is mandatory for being able to useM4at all. More on this here.Bed dimensions
Setting the inner usable area of the board. The engraver has no limit switches so only soft limits apply.
Known issues
I found that th

$Hcommand is not working and freezes the laser. So don't use the homing button for now.The jog Home button works "per session" as in: "when you start the laser and it uses the current position as it zero point it can get back there". But it can not locate the true zero point when it is powered off in between.
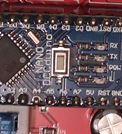
Also sometimes I need to reset the Arduino to properly function again. I just press the tiny white switch on top of the board then and I can start engraving again. Mind you: this is not keeping current progress of engraving.
Anyay, thanks @arkypita for building LaserGRBL. It's a really nice tool for free and let's starters have a quality engraving stack!
Regards Sebastian
Beta Was this translation helpful? Give feedback.
All reactions